Now tell me, Do you use Windows 10 or 8 on your system? If your answer is yes, you will want to install active directory users and computers Windows 10 along with some other Active Directory applications. Now, why should you install it? Well, bear with me. Generally, Active directory users and computers are not installed by default, and therefore it needs to be installed from third-party applications. To work with Windows 10 active directory users and computers, it is required to install remote server administration tools for Windows 8 or Windows 10. The remote server-based Active Directory tools include Server Manager, Microsoft management console snap-ins, and command-line tools to manage roles and features running on the Windows server.
Windows 10 Active Directory Users and Computers
First, let’s understand Windows 10 active directory users and computers before switching on to its installation process. The Active Directory users and computers is a Microsoft Management Console Snap-in tool of Windows Server operating systems used to manage recipients and helps in performing exchange-specific tasks. It is considered an essential tool for connecting and managing Windows Server Technical Preview. After the active directory users and computers Windows 10 anniversary update, this RSAT (Remote Server Administration tool) was loaded with new features to run better while using Active Directory. But recently, many Windows users were facing the problem of RSAT Windows 10 not installing a Windows update.
How to install active directory users and computers on Windows 10?
In this article, I will tell you how to install active directory users and computers on Windows 10 and its tools so that your computer allows the running of Windows 10 to connect and manage the Windows Server Technical Preview.
Step 1: Firstly, you will need to download the latest version of Remote Server Administration Tools for Windows 10 using the following link :
https://www.microsoft.com/en-us/download/details.aspx?id=45520
Step 2: Select your Windows 10 version and hit the Enter button to get it downloaded.

Step 3: You will be asked to choose from two options depending upon the bits of your OS. Select anyone according to your specification.

Step 4: After completing the download, begin the installation process. Generally, the installation process gets completed within a few minutes, so after installing, restart your computer.

Now it is required to activate the RSAT function since you must do it necessarily.
You can follow these steps to activate the RSAT function:
Step 1: Go to the Search bar and type Programs and features
Step 2: Then select Programs and features.
Step 3: Then, click on the option Turn Windows features on or off from the left pane.

Step 4: In the next step, you will need to expand the Remote Server Administration Tools node. Then go to Role Administration Tools and click AD DS and AD LDS Tools.
Step 5: Click AD DS Tools and hit the OK button.

Step A: Open the command prompt in administrator mode. To do so, the First search for the command prompt and right-click to run as Administrator

Step B: Type the following three commands in the command prompt window, as shown in the below example
dism /online /enable-feature /featurename:RSATClient-Roles-AD
dism /online /enable-feature /featurename:RSATClient-Roles-AD-DS
dism /online /enable-feature /featurename:RSATClient-Roles-AD-DS-SnapIns

That’s all! You are done with installing AD DS tools !! Now go to the next step, 6.
Step 6: After you see these AD management snap-in tools installed, go back to Control panel. From there, select the Administrative tool. A window will appear in which you will now see Active Directory users, and a computer Windows 10 link will appear.

Step 7: In the next step, you will have to run the ADUC snap-in tool and then connect it to the domain controller. The domain controller will be automatically selected if your computer is in an active directory domain state.
So in this way, you can work on installing active directory administrative center Windows 10 to manage Windows-related services. This is one of the most common and most straightforward methods used to install Active Directory users and computers Windows 10. With just a few steps, you will be all ready to use the Windows updates and services. As many users also questioned “how to Open active directory snap in windows 10” and “how to fix Directory Service Was Unable to Allocate a Relative Identifier,” I have mentioned some solutions to help; them out!
Open or start Active Directory Users and Computers Snap-in.
To start or open the Active directory, snap-in windows 10; follow the below steps:
Method 1
step 1: Firstly go to start, and then open run
step 2: In a run, type dsa.msc, and now click on OK

Method 2
Step 1: Go to Start, the Open control panel.
Step 2: Now, Navigate to system and security and choose Administrative Tools

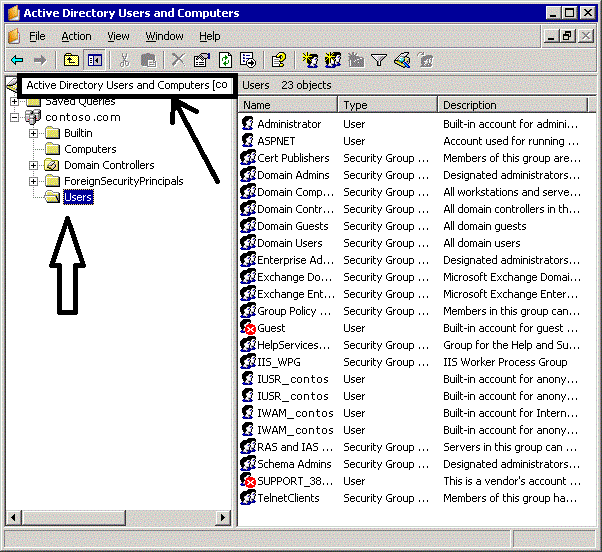
Step 3: Then, a list of tools will appear; find the Active Directory Users and Computers folder and Double-click on it. That’s all! The following window will appear.
Fix Directory Service Was Unable to Allocate a Relative Identifier
The directory service was unable to allocate a relative identifier (RID); the problem occurs when the domain controllers fall short of relative identifiers. These relative identifiers are nothing but unique security identifiers assigned to every object within the AD domain. This object not created error occurs in a scenario where a domain controller tries to create a new object before it receives the new RID set. So to Solve this, follow the below steps carefully.
Also Read: Fix Microsoft Teredo Tunneling Adaptor not working
Method 1: By Changing the RID Block Size entry
By Changing the RID Block Size entry in the following values key. HKEY_LOCAL_MACHINE\SYSTEM\CurrentControlSet\Services\NTDS\RID . The minimum value for this key is 500, and any value assigned to this entry between 0 and 500 will be considered 500 by the system. So enter the needed value and click OK.
Method 2: Check RID master is online and accessible or not
To check the ID master is online and accessible or not, read the following steps:
Step 1: Find which Domain controller(DC) is hosting the RID master FSMO role. You can do this by going to the active directory Users and Computers folder. Then right-click on the domain name and select operations masters.

Step 2: Now select the RID master tab. Change it and try to connect it to any shared resources to ensure communication. If this method doesn’t work for you, then don’t panic. Wait for the Domain controller to receive a new RID set.
If you still have any queries, then feel free to ask by commenting below!